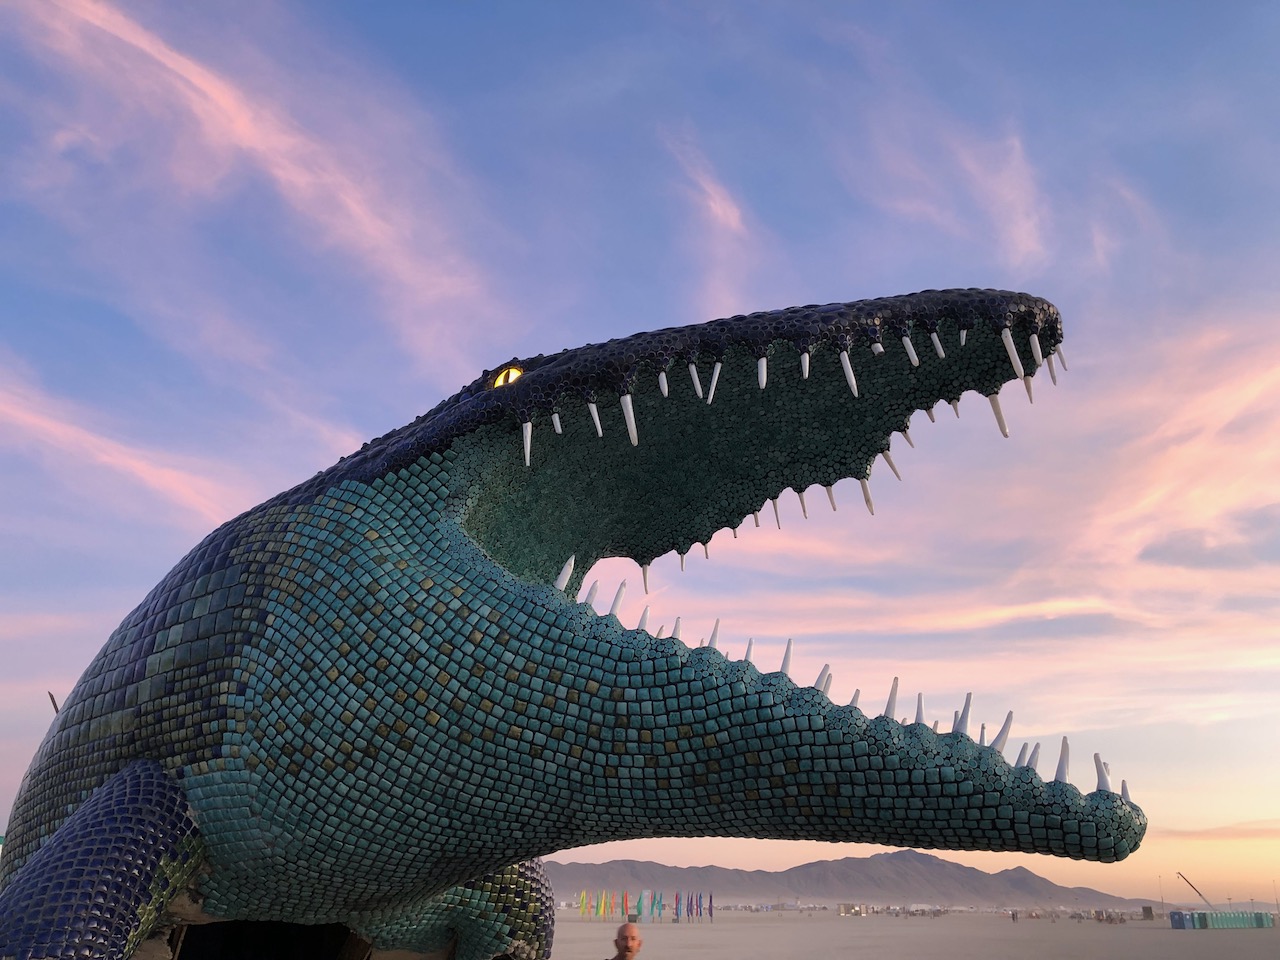
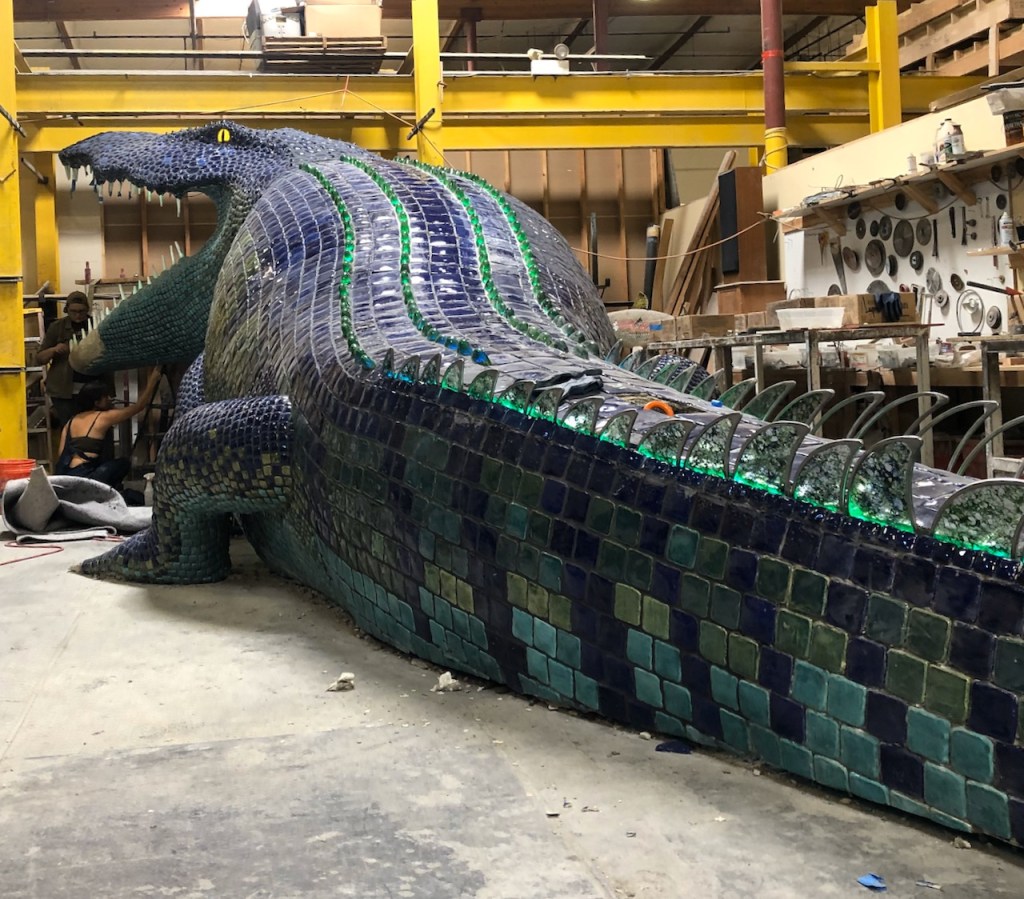
My very first project was designing the lighting for a 40-foot long ceramic tile sculpture of a Nile crocodile, created by well-known local artist Peter Hazel for Burning Man 2019. It’s made from over 80,000 hand-made ceramic tiles, plus fused glass eyes, teeth, dorsal ridges, and tail fins. The artist’s goal was to individually backlight each fused glass element (thankfully, a much smaller number).
The dorsal ridges are made from recycled Jameson whiskey bottles, heated in a kiln and slumped over a form, leaving room inside for a single LED. The tail fins are color glass sheets, with LEDs mounted underneath to uplight them. The teeth are solid glass, drilled out to accept a single LED at the base.
The artist selected “bullet” type LED modules, to simplify mounting in the mortar substrate, or in the case of the teeth, inserting and gluing into a hole drilled in the base. Each module contains a WS2811 driver chip and a 0.3W RGB LED.
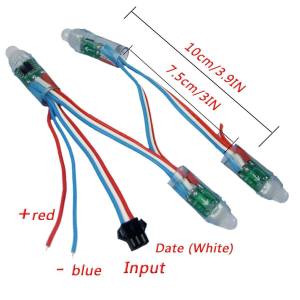
Each of the 50 individually-addressable LEDs on a string is connected with three wires: Power, Ground, and a single data signal that implements a unique serial data protocol. I used a 12V version of these strings (instead of 5V) to minimize voltage drop across the series-wired strings.
For the eyes I used 5W MR16 white LED bulbs that are typically used for landscape lighting. They were mounted in the eye sockets behind painted glass “eyes”.
Due to a relatively tight schedule and my lack of experience at that point, I chose to use off-the-shelf hardware and software for the lighting control system, all based on the DMX512 standard that is commonly used to control theater stage lighting.

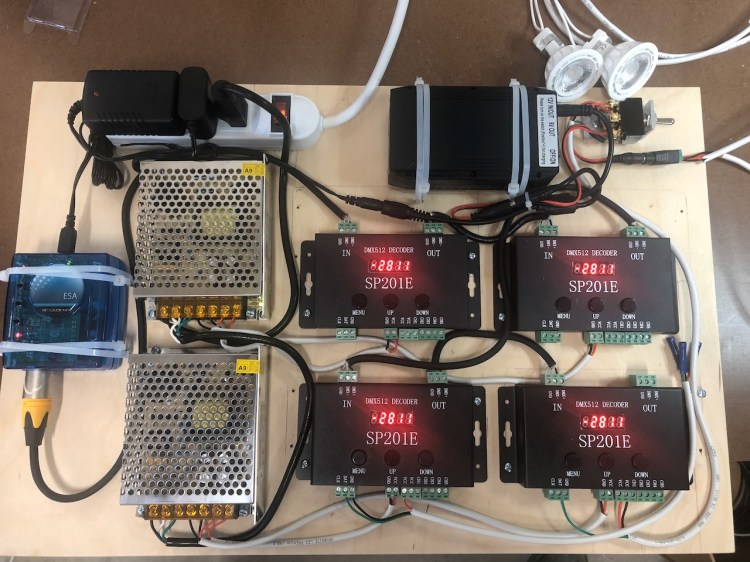
The DMX decoder I chose can drive a single addressable LED strip/string over a 3- or 4-wire serial interface. It also has 5 pulse-width modulation (PWM) outputs to directly drive up to 5 discrete LEDs or non-addressable strips. I used two of the outputs to drive the two white LED eyes. Four of these decoders were needed to drive everything.
A single DMX “master” device is needed to control all of the DMX decoders operating as “slaves” (forgive my use of the common terminology), and I chose what I thought was the most flexible and low cost option: a SLESA standalone controller from Nicolaudie Architectural.

It turns out that DMX isn’t a great choice when using LED strip/strings with large numbers of LEDs. A DMX controller can drive up to 512 channels, where each RGB component of each LED requires its own channel. So you can rapidly run out of channels. There are ways to expand beyond the 512-channel limit, but it’s semi-awkward and not all controllers support this. Also, DMX controllers are insanely expensive for what they really are. They have limited memory and processing power, and there are very few components. The specific model of SLESA controller I needed for this project is the U8, which costs about $500. Ouch!

We needed 11 full strings (550 LEDs total) to cover the back, tail, and upper/lower jaws. To avoid exceeding the DMX limit, and because we didn’t really need independent control of all of the strings, I wired some of the strings on parallel, as shown below. For example, all 4 dorsal strings (on the back) are driven by the same interface from DMX Decoder 3.
Because the spacing of the LEDs on the strings were closer than the spacing between the dorsal ridges, only every third LED is used to light on one of the Jameson bottle ridges. The others were pushed inside to provide lighting for the hollow interior of the sculpture, which is accessible from a hatch below the throat. The interior provide a nice refuge from the daytime heat or nighttime cold, although we ran out of time to line it with pink fur as planned.
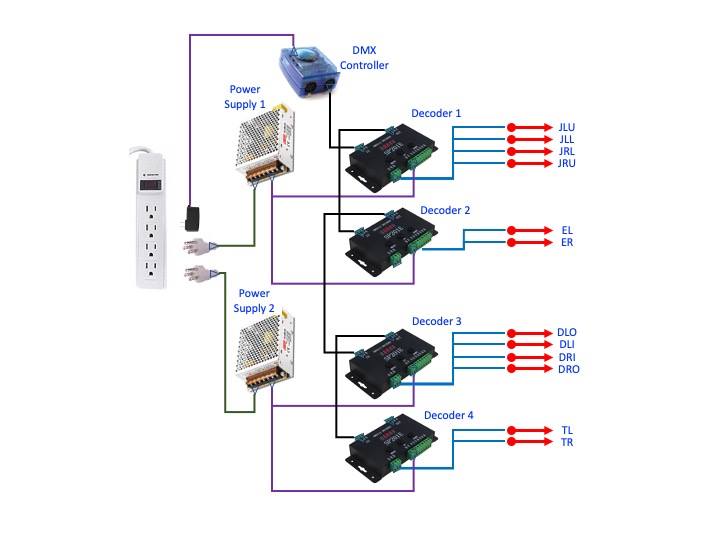
In operation, the light pattern/sequence is identical across each of the parallel-wired dorsal strings. Same for the four jaw strings. Note that I decided to split the load between two separate 12V 10A power supplies, but other approaches would have worked as well. The DMX signal from the controller is daisy-chained through each of the decoders.
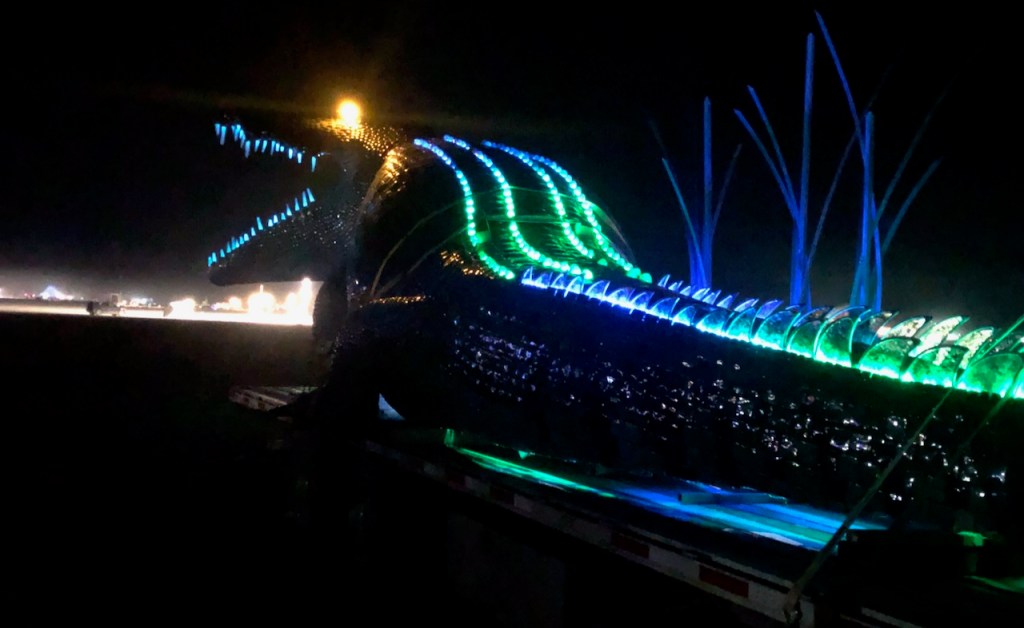
Programming the light sequences turned to to be a huge challenge. The sequences were relatively simple, but involved a large number of lights. The artist wanted a fairly subtle lighting theme, with green and blue colors alternately flowing down the back and tail like water. The teeth remained a constant color, and the eyes were a constant brightness.
Two different software packages were available to program the SLESA controller using a timeline paradigm and associated graphical user interface (GUI). The low-end package (Easy Stand Alone 2) was much too limited, so I ended up using the more powerful ESA Pro 2. It was still very difficult to achieve the desired effects, partly because the software was still a Beta test version with lots of bugs. I won’t spend more time talking about this software, because I hope to never have to use it again…
The lighting for all Burning Man art is powered by portable gasoline generators that are only run at night. Late in the development process I decided that I wanted to light the eyes during the daytime (because it looked cool), so I added a 12V, 132 Watt-hour Lithium ion battery to the design. This allowed the eyes to run on the battery all day, and then (manually) switch to generator power at night. So here’s what it all looks like:
The Niloticus sculpture is hollow inside (but still weighs 16 tons), so the controller is mounted inside the head. Connections from the controller to the first LED of each string used 3-conductor 18 gauge cable, with JST-SM connectors (yes, using 18 AWG wire!) on the LED side and crimp butt connectors on the controller side. The crimp connectors is where I made the parallel connections to multiple strings as needed. It was intended to simplify installation, but I doubt I’d do it this way again.

Anyway, everything ended up working perfectly, although later the artist decided that the lighting was a little too subtle compared to all the other over-the-top LED lighting out on the playa.
So that’s it! It ended up being a pretty successful learning experience, and the artist got lots of great recognition for his artwork. Niloticus was sold shortly after the event, and now resides at the Point San Pablo Harbor marina in California.
Stay tuned for a description of my second (but really simultaneous) project, which was for another Burning Man artist at the 2019 event.


2 thoughts on “First Project: Niloticus”