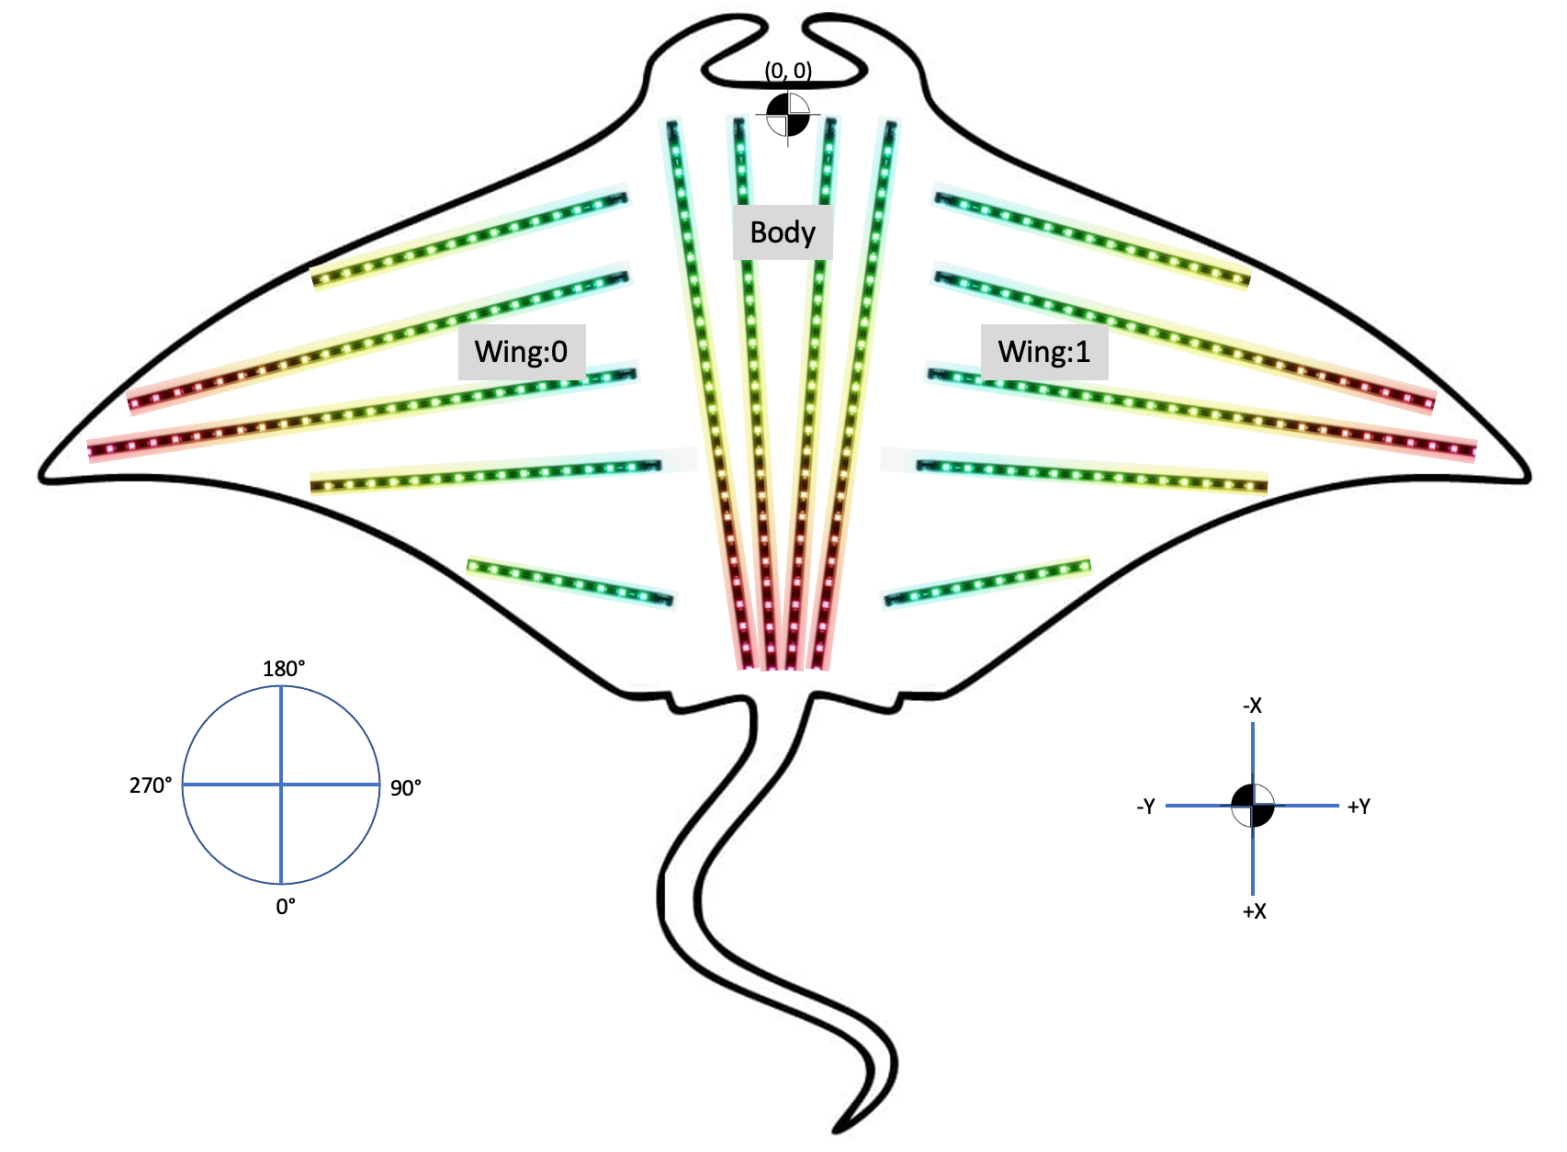
In a previous post I described the origins of a project to replace the lighting in one of Peter Hazel’s existing sculptures, a 24 foot tall glass and steel Manta ray called Fly By. This was a perfect opportunity for me to try out the new controller hardware I’ve been developing – boards that can be daisy-chained together to support really large installations. The Manta isn’t huge; it requires 14 LED strips of various lengths and about 2000 pixels total. But that’s big enough to merit a “distributed controller” solution. As you’ll see below, I’m using the FLiCr board as a master controller that will also drive 4 LED strips in the Manta’s main “body”. The FLiCr board uses an RS-422 serial bus (the SLiCBus) to communicate with two remote controllers based on the SLiC board. I’ve previously written about the SLiC board (aka DLC), but the concept has changed quite a bit, so I’ll describe it in more detail below. Each SLiC board can drive up to 8 LED strips, and for this project each SLiC will drive 5 LED strips in each of the two wings.
LED Strip Selection
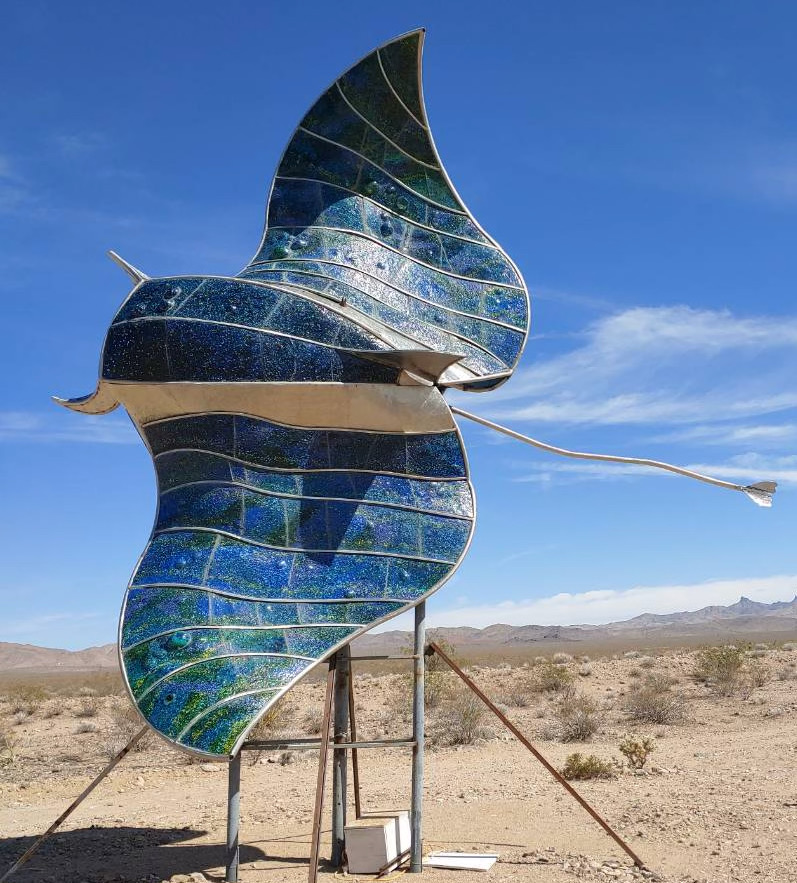
Fly By is permanently installed in the tiny town of Nipton, CA, in the northeast corner of the Mohave National Preserve. It’s exposed to intense heat, UV radiation, dust, and occasional rain. Not to mention the scorpions and rattlesnakes who are possibly puzzled by the marine creature hovering above the desert floor. So to maximize the longevity of the lighting system (and minimize “service calls” requiring an 8-hour drive), I’ve spent a lot of time selecting components that can withstand these arduous conditions. The first challenge was selecting the best type of LED strip.
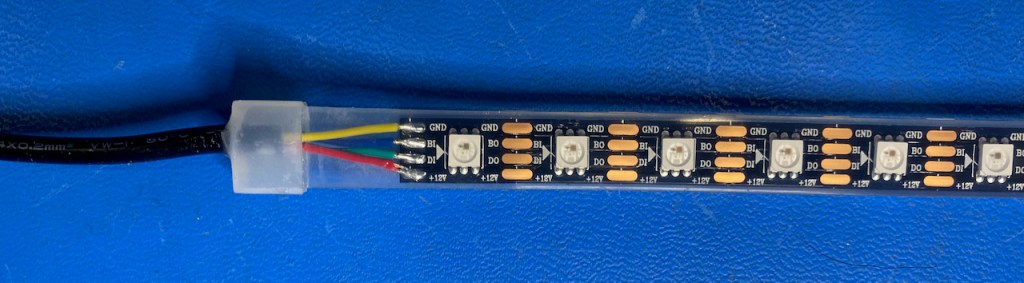
If you’ve read many of my previous posts, you know that I’m partial to WS2815 addressable RGB strips. Their use of a 12v supply (versus 5v) simplifies the power wiring (see my post on that topic), and the redundant data signal prevents a single-pixel failure from taking out the whole strip. For protection against dust and rain, WS2815 strips are typically available with an ingress protection rating of IP30, IP65, and IP67. Strips with an IP30 rating are only intended for dry, indoor installations. In theory an IP65 strip, manufactured with a silicone conformal coating over the LEDs, should be adequate for this project, since the second digit of ‘5’ signifies protection against “water jets”. IP67 strips are made with a thick silicon sleeve over the entire strip, and should be overkill since the ‘7’ indicates that it can withstand complete immersion up to 1m depth for 30 minutes.
I usually buy my WS2815 strips from BTF-Lighting via Amazon. To help make a decision, I contacted customer support at BTF-Lighting. Surprisingly, they discouraged me from using either their IP65 or IP67 strips in a long-term outdoor installation. They strongly recommended their IP68 version of the WS2815 strip, which has both the silicone conformal coating and the silicone sleeve. Unfortunately, they only manufacture their WS2815/IP68 strips on a per-order basis. The manufacturing lead time is 2-3 weeks, not including shipping/customs time, which is 10 days for air and 30 days for sea.
The good news was the price. The IP68 strips, with air shipment included, ended up costing about the same as the IP67 strips from Amazon (free Prime shipping). There is no minimum order quantity, but the price might be higher for very small quantities.
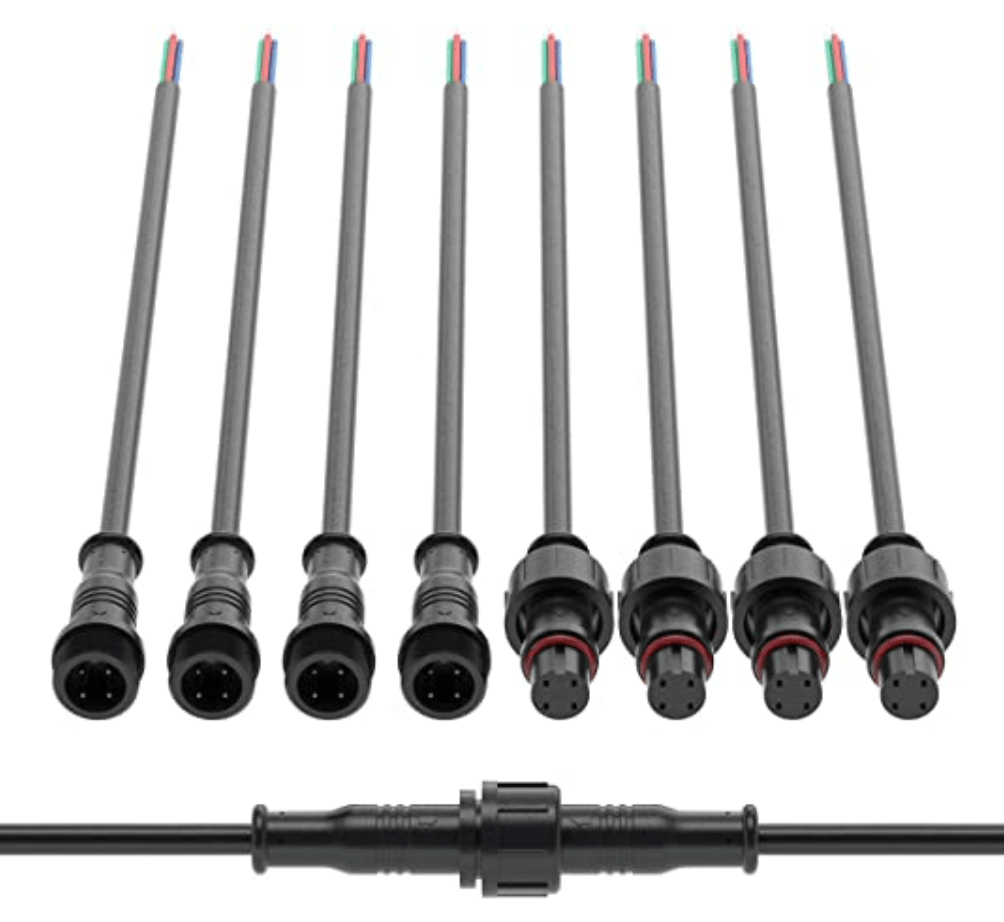
The quality of the strips I received is excellent. The silicone sleeve is chemically bonded to the conformal coating, giving them very good optical clarity compared to the IP67 strips with a non-bonded sleeve. They are slightly less flexible, but that’s fine for this application. Each strip comes with a small 4-pin waterproof connector on each end. I don’t yet know how reliable these connectors will be (a bit nervous about that), and the gauge of the pigtail wire is only 24 AWG, a little wimpy in my opinion. The short pigtail section gets warm when running a strip at full brightness.
Power Distribution
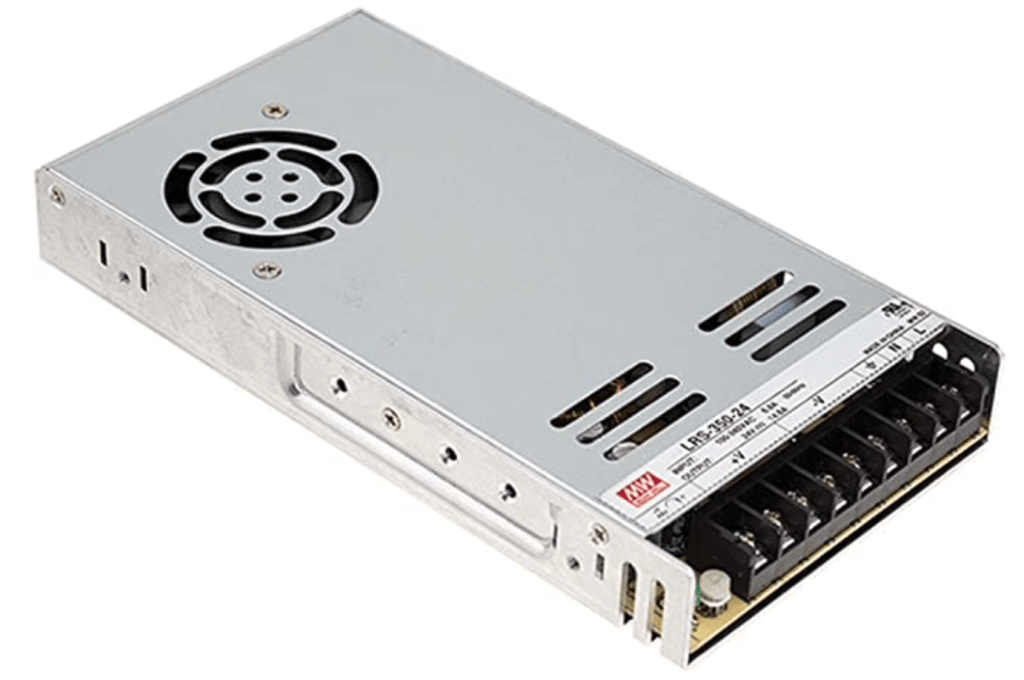
My first decision was whether to use a typical “enclosed” power supply or an environmentally-sealed one. Enclosed power supplies are much cheaper, and available in a wider range of power levels, but must be mounted in a sealed enclosure for outdoor applications. Since they rely on forced air flow (via the fan) for cooling, the outer enclosure must also provide a fan or some means for the hot air from the power supply to escape. This adds complexity and significant cost to the enclosure, and I didn’t find many options that would work for this application. So even though the sealed type power supply was about twice as expensive as the non-sealed (for the same wattage), I think this approach ended up being less expensive, and certainly more compact. Sealed power supplies rely on natural convection and radiation for cooling. Since they will be mounted on a metal baseplate inside the Manta, cooling shouldn’t be a major issue.
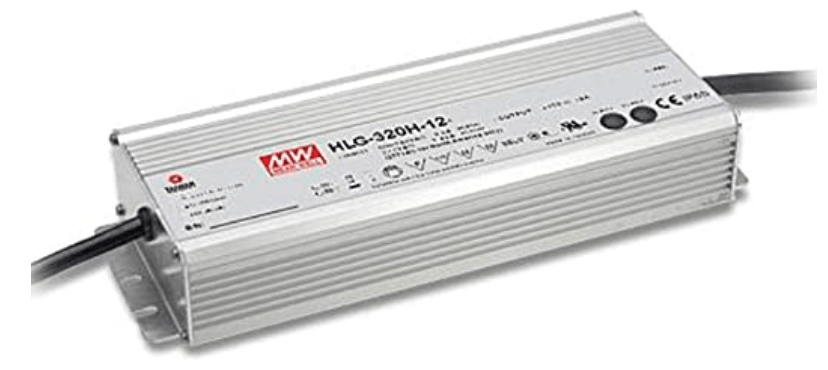
WS2815 LED strips require 12-15mA per pixel at maximum brightness (regardless of color), so 2000 pixels requires a maximum of 30A at 12v, or 360 Watts. My preferred power supply vendor is Mean Well, so I decided to use two HLG-320H-12 units. These are rated for 22A (264W) of continuous current at ambient temperatures up to 50°C (122°F), with an expected lifetime of 100,000 hours (11.4 years). One power supply will drive only the 5 strips in one of the Manta’s wings and its associated SLiC controller, requiring about 9.5A. The other power supply will drive the second wing and its SLiC controller, plus the master FLiCr controller and the 4 LED strips in the Manta’s central body. Its maximum load will be about 20.5A. Normally I prefer to run a power supply at no more than 85% of its rated limit, but in this situation I think it will be OK:
- The lighting will normally only be turned on at night when it’s cooler.
- Not all of the pixels will always be on at full brightness.
- My experience is that the per-pixel current is closer to 12mA than 15mA.
- My estimate of 2000 pixels is conservative; it will probably be less.
Here’s how everything is connected:
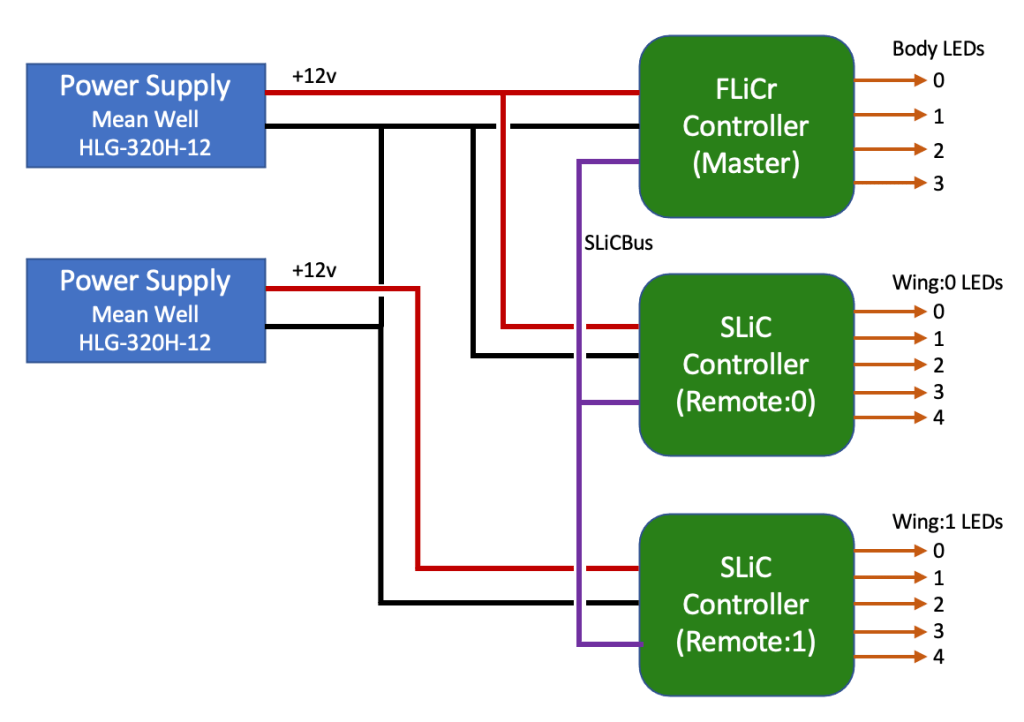
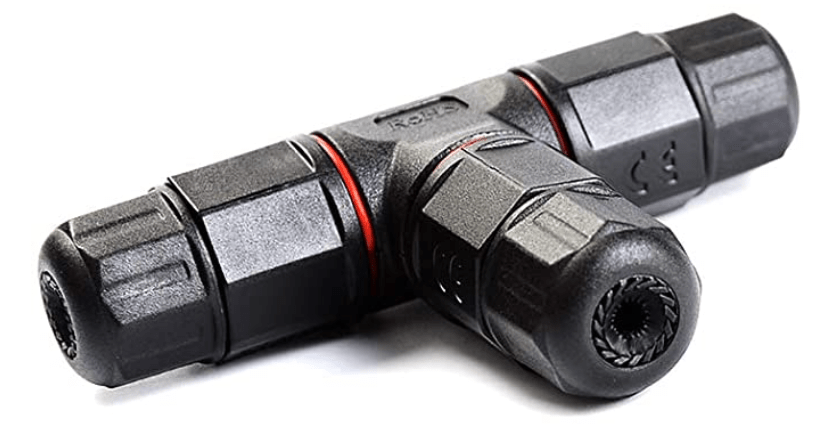
For the power connections I used 14 AWG stranded 2-conductor cable that has high resistance to moisture and UV radiation. For the “tee” connections I used these waterproof junction “boxes” that are rated for 25A.
Master Controller (FLiCr)
I’ve previously written about the FLiCr controller (post #1, post #2) so I won’t repeat anything here. For this project I mounted the FLiCr board in a nice waterproof enclosure with a clear hinged lid. I also mounted a pushbutton switch, which will be used to cycle through a menu of animation scripts.
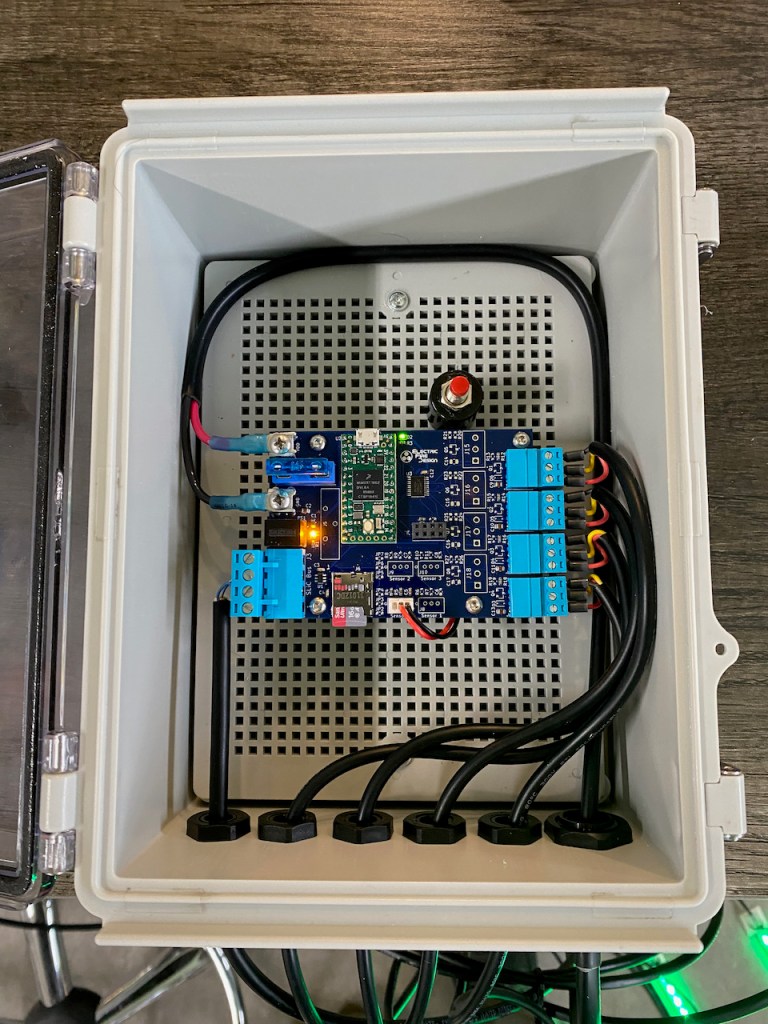

At the cable entry/exit points I used waterproof cable glands, which are available in a variety of sizes. The PG7 size worked for the LED and SliCBus cables, and the PG9 size was needed for the larger power cable.
The connections from the controllers to the LED strips are made using 20 AWG 3-conductor cable. Normally I would use 18 AWG wire for LED strip connections, but since the cable runs from the controllers to the LED strips will be pretty short in this application (less than 3m), 20 AWG will be adequate. See my article on LED wiring design for more details on this.
Remote Controllers (SLiC)
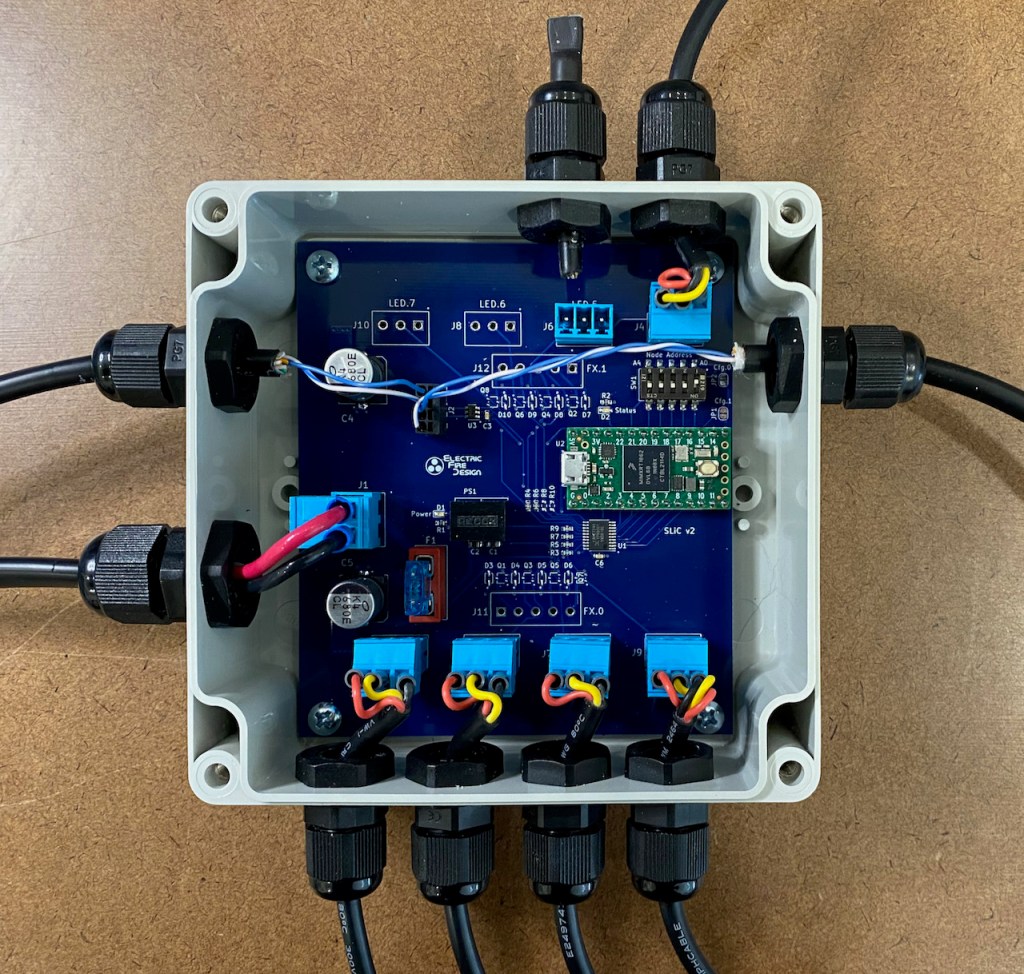
The genesis of the SLiC board was something that I called the Distributed Lighting Controller (DLC), which was intended to be very small and capable of driving two RGBW flood light fixtures. Power to each DLC would be distributed over the same Cat5 cable as the SLiCBus serial data signals. Maybe I’ll return to developing that concept at some point, but the DLC had too many limitations to be used for the Manta or other near-term projects. So the “new and improved” SLiC board has a power input that’s separate from the (now) 2-wire SLiCBus and uses the same pluggable screw terminal connectors as the FLiCr board. The boards can be assembled to support up to eight addressable LED strip outputs or two RGBW fixture outputs, each with a dedicated connector.
The additional connectors resulted in a larger board, with the side benefit that assembly into a waterproof enclosure with cable glands is much easier than the DLC. The dimensions of the enclosure are 4.803″ L x 4.724″ W (122.00mm x 120.00mm) X 2.165″ (55.00mm). While the enclosure I selected is more expensive (about $20 USD) than those available on Amazon, it’s much higher quality and very easy to use.
Here’s what everything looks like, (messily) assembled in my garage for initial testing:
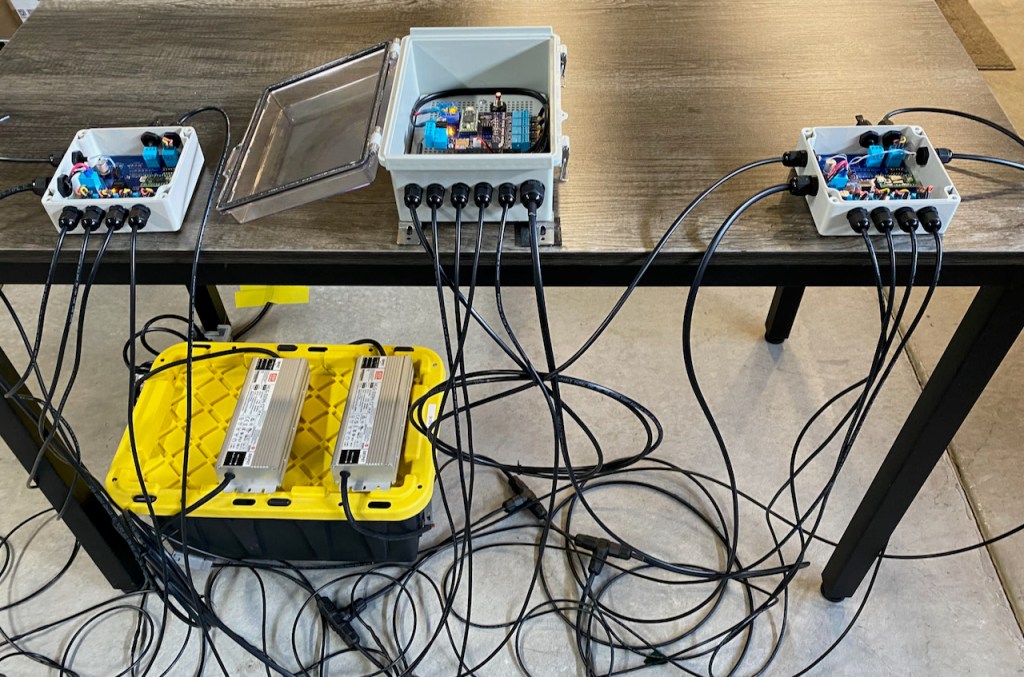
The hardware is working perfectly so far. I’ve completed all of the “infrastructure” software that supports script parsing and execution by the master controller, and the distribution of lighting effect commands from the master to the remotes via the SLiCBus. Now I’m busy writing the code to implement some of the more sophisticated lighting effects, like traveling/standing wave patterns and arbitrary-angle color “wipes”. That will be the topic of my next update, hopefully with some cool videos.
Special message from the publisher/editor/writer/me:
I see you out there! The WordPress stats tell me that about 150 people a week are reading at least one of my blog posts. But very few people leave comments. So I want to encourage you to leave feedback or ask questions, either on the blog page or by emailing me at keith@electricfiredesign.com. Thanks for reading!

hey Keith, eager to see the final results!
LikeLike
Thanks for this! I e been looking forever for a good resource on how people implement lighting on these larger installations.
LikeLike
So cool! How do you find out about opportunities like this??? It’s a dream of mine to mix art and electronics for a living, but it’s really tough to find sponsors and gigs!
LikeLike
What worked for me was tracking down local sculpture artists and volunteering my services (most Burning Man art projects are built with volunteer labor). I didn’t have any LED/lighting experience, but my engineering resume convinced them that I could handle it. That eventually led to paid work, but sometimes the pay was contingent on sale of the artwork. But I had a big advantage of not depending on that income, as I have other income from retirement savings and other engineering consulting. I hope you find a path. Good luck!
LikeLike