The last couple of months have been super busy. I’ve got seven projects to update you on!
Octopus
I last wrote about this project in the January update. The customer isn’t quite ready for delivery, so I put off completing the work on the “zap” lighting effect I described in January. However, my blog posts got noticed by the Senior Editor of Make Magazine. After an interview and a professional photo shoot, the magazine published a brief piece featuring me, artist Peter Hazel, and Lucy the octopus:

Lucy is based on a slightly larger sculpture Octavius that was originally shown at Burning Man 2016. See this link for lots of photos, including during construction.
Desert Shark

The Desert Shark (aka “Jerry”) was a sculpture created for Burning Man 2022, as described in this blog post. The original post-Burn plan was to display it locally in Reno while searching for a buyer, but recently Peter was asked to display it at the Mare Island Art Yard in the San Francisco Bay Area. We made some major changes to both the construction and the lighting, but I was able to reuse the controller electronics and the vast majority of the software. Lots of work, but otherwise nothing really interesting to report.
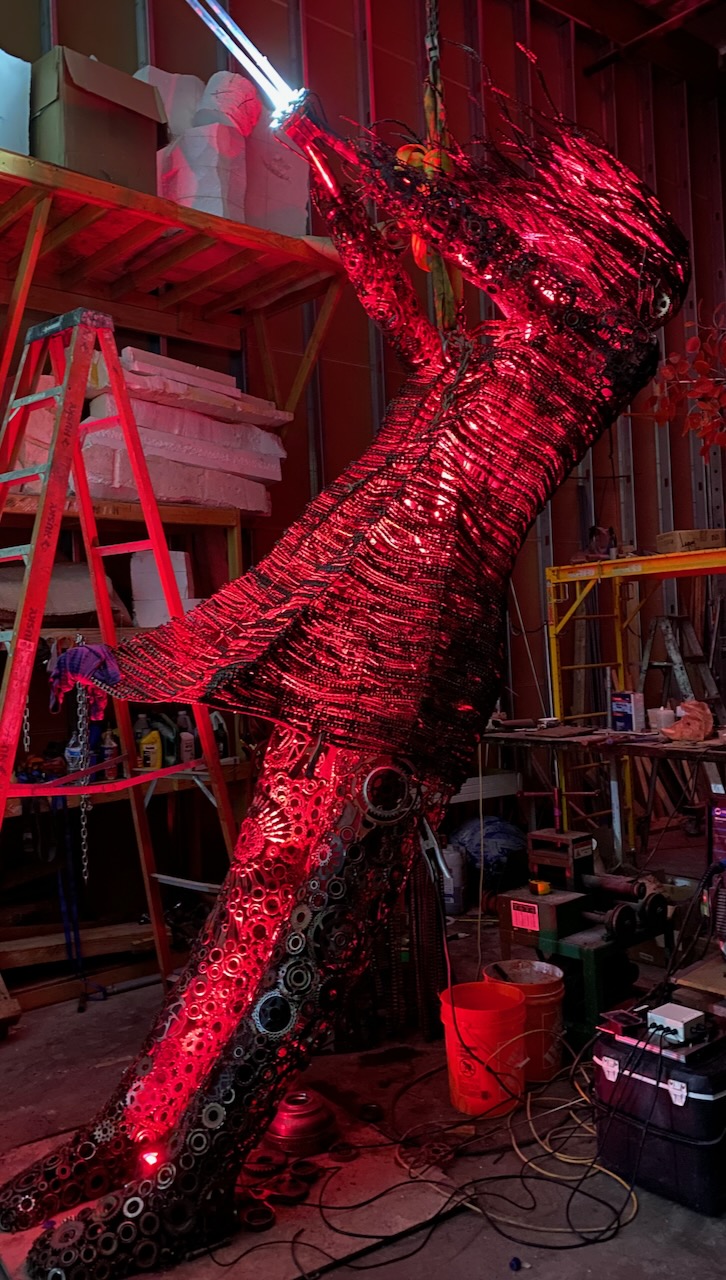
Balloon Girl
Peter started his artistic journey with highly complex sculptures made of mosaic ceramic tile. Over the last couple of years he’s focused a bit more on glass and steel. The Balloon Girl explores a new medium: used motorcycle parts. Peter is a part-time motocross racer, and he seems to have found sources for a near-infinite supply of parts. The Girl is nearing completion, but what isn’t shown in the photos above are five colorful fiberglass balloons at the end of 10-foot “strings” (thin steel rods). This sculpture is headed for a public space in Midland, Texas, which is apparently a windy city.


Peter only recently decided to add illumination to the sculpture, so I had to really hustle to finish everything before the sculpture left on a semi truck for Texas. Fortunately I had just finished testing a new controller that would be perfect for this application (see the Flex Controller section below). A single Flex board is used to drive three RGBW flood light fixtures that illuminate the body, plus five neutral-white high-power LEDs to illuminate the balloons. The original plan was to light the balloons from the interior, but the uneven density of the fiberglass resulted in very blotchy lighting. So we switched gears and mounted all five lights in a ring around the girl’s hands. This eliminated the need to independently drive each of the white LEDs, so I wired them all in parallel to only one of the five controller outputs allocated for this purpose. With some of the “balloon strings” attached, the Girl looks like she’s wielding a Jedi lightsaber (photo above, right).


No fancy lighting effects on this project; the white lights remain constant and the RGBW flood lights slowly and smoothly fade across the spectrum, avoiding the yellow-green regions that just looked yucky. As usual, amateur photographs like mine don’t do it justice. It actually looks pretty spectacular in person, and Peter is very happy with the results. Yay!
I’ll try to provide another update when I get photos post-installation in Texas.
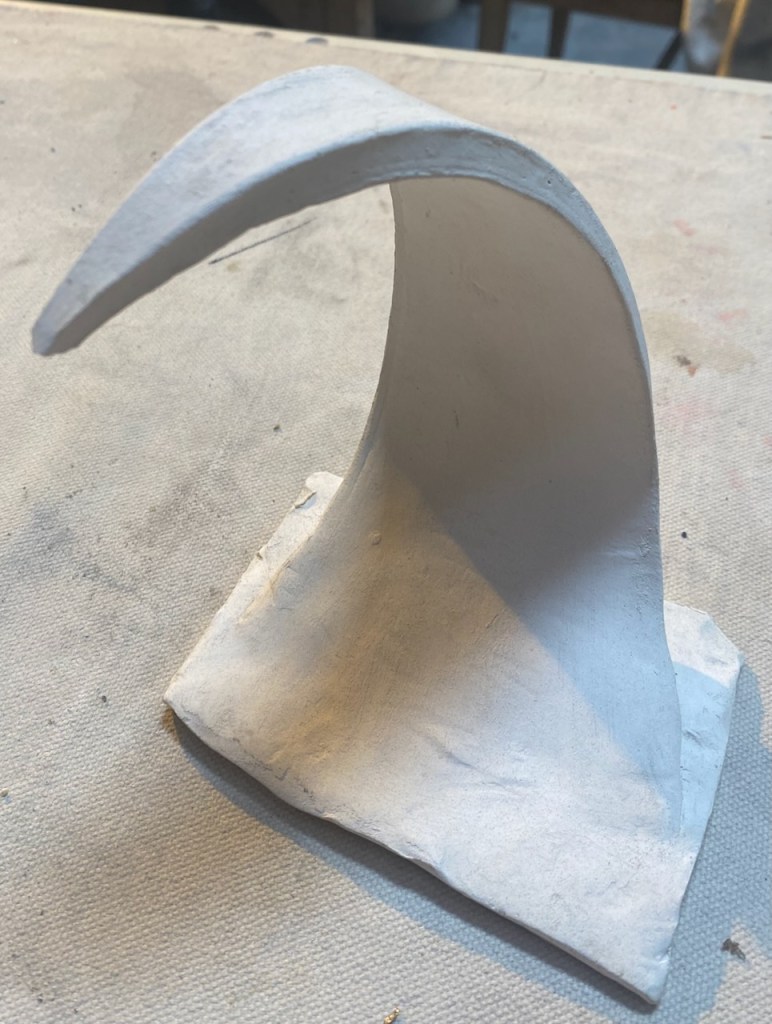
The Wave
In my February update, I wrote about a “waterfall” lighting effect intended for a new sculpture that Peter was proposing as part of a competition for a public art commission. That didn’t pan out as hoped, so I suggested that we use some of the ideas for a piece to take to Burning Man this year. I even created a few waterfall-ish sketches, but since I’m more of an engineer than an artist, Peter found them a bit…boring. Instead he proposed using the same glass teardrop texture and lighting effects, but in the shape of a 12 foot (3.6m) tall ocean wave. Absolutely massive!
The current plan is to run LED strips vertically on both faces of the wave. The big challenge will be to design the structure so that the LEDs can be replaced in case of failure, without the need to remove any of the thousands of glass teardrops that will be glued to the wave surfaces. I plan to make acrylic channels that allow an IP68 WS2815 strip (no adhesive) to be slipped into each channel from the bottom. Some of the strips will be up to 7-8m long, so I’ll need to join two strips without creating too much bulk to slide through the channel. I’ll have access to the top of the channels to facilitate “fishing” the strips up through the channels, but since there won’t be room from any connectors to slide through, I plan to power the strips only from the bottom (i.e. no power injection at the top). I think these will be OK, since the waterfall lighting effect results in per-strip power consumption that is significantly less than the maximum. I’m also considering using lower-density (30 LEDs/m) strips, since the higher density (60 LEDs/m) strips may be overkill for the waterfall effect at this overall scale.
Stay tuned for more details on this over the next couple of months.
Aspen Trees
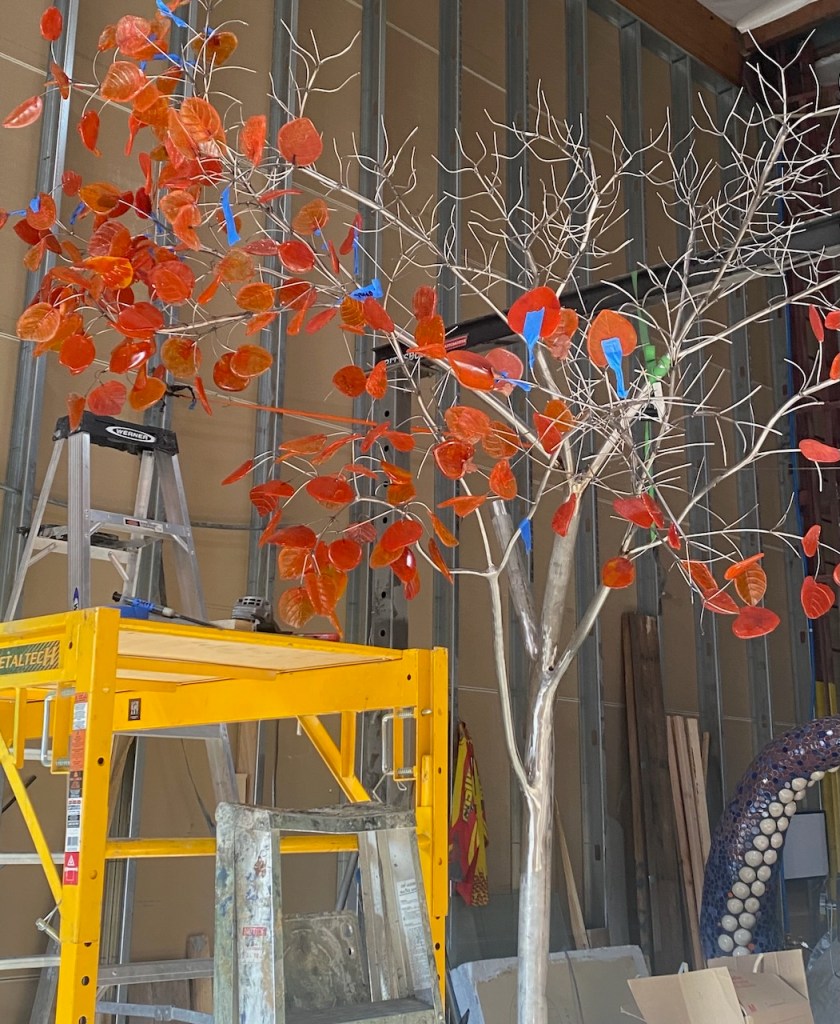
For another public art competition in Colorado, Peter is proposing to create a small grove of stainless steel and glass aspen trees. He’s currently building a quarter-size prototype, which also plan to take to Burning Man along with the Wave. The glass leaves on each tree will be lit with eight of my custom Fido RGBW spotlights, which will be hidden inside the tips of “broken” branches.
Each of the trees in the grove will be connected by glass “roots” that can be seen through a perforated steel “forest floor”. The glass roots will be backlit by WS2815 addressable LED strips that enable dynamic, flowing light patterns.
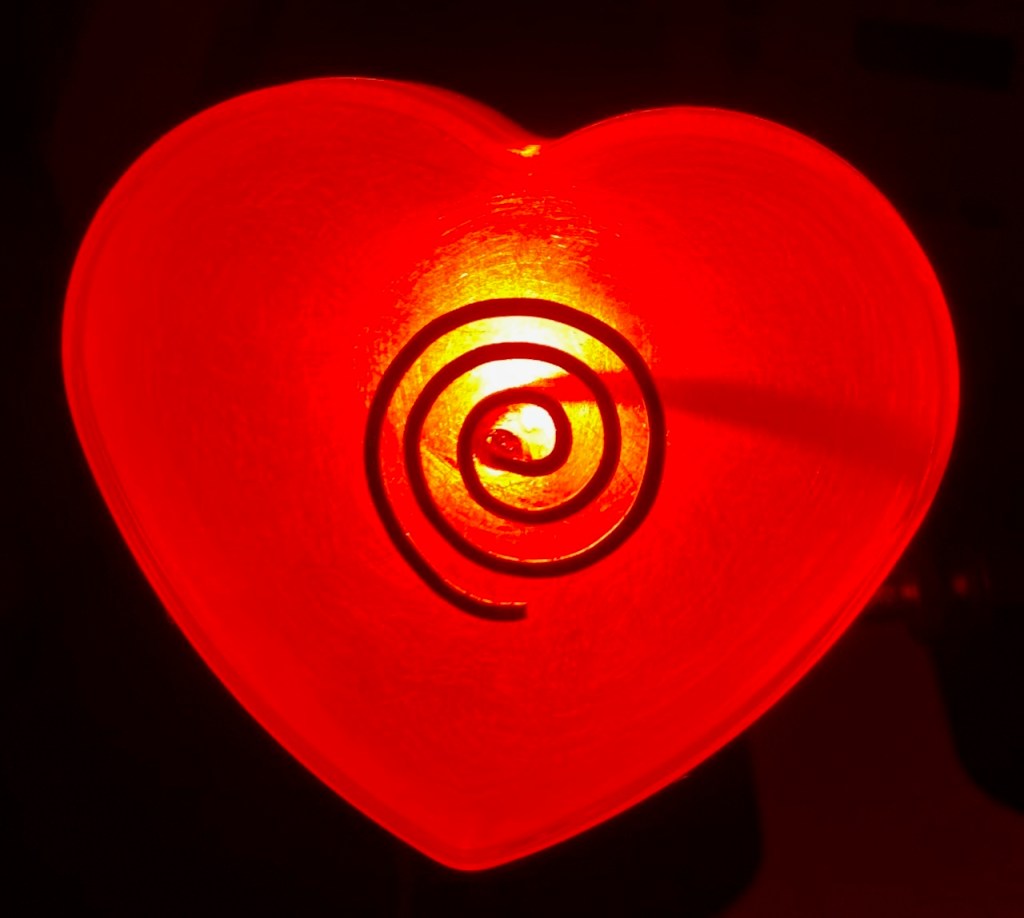
We intend to make this installation interactive, so that people can touch the trees in ways that influence the light patterns, especially in the interconnected roots. For example, each tree may have a backlit glass icon embedded in its trunk, with a metallic shape connected to a capacitive touch sensor.
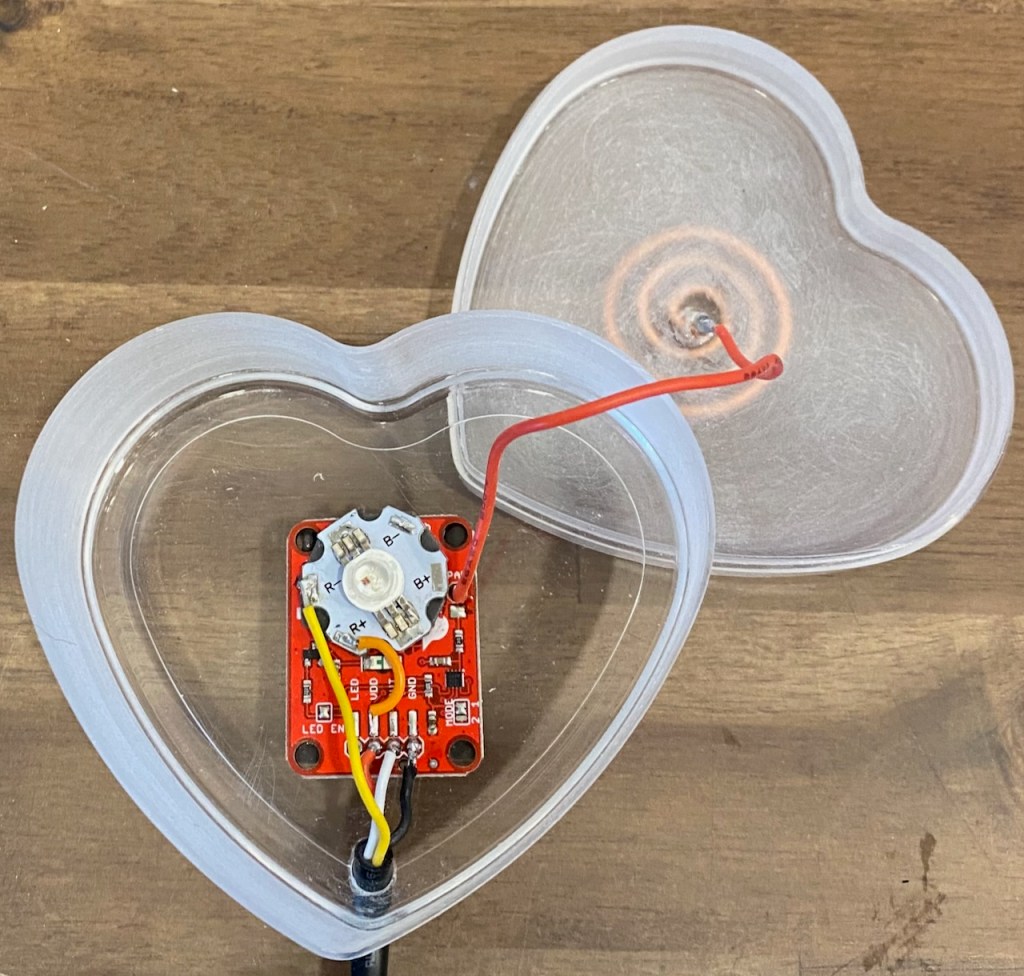
I made a quick prototype with a heart-shaped acrylic box, with a high-intensity red LED glued to the touch sensor board. The sensor board includes a circular touchpad, but it also works with metal objects connected to the pad. I made a hammered copper spiral out of 14 AWG solid wire, and this worked very well even with a 160mm interconnect wire.
FidoLight

For those of you following the progress on this project (see Update #8), the aluminum screw cap mounting plate/heatsink worked out pretty well. The diameter of the cap lip turned out to be a bit too small to rest on the flange inside the flashlight housing, so I used a nibbler tool to create 6 slots in the sides. This allowed me to spread the newly-formed tabs out to the correct diameter, and conveniently, provided perfect pass-throughs for the six LED wires.
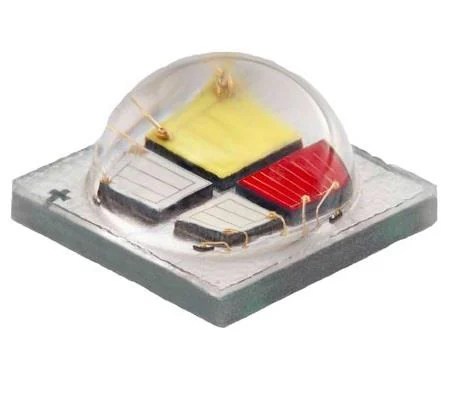
A couple of things about the Fido lights I haven’t been satisfied with are the wide (120º) beam pattern, and the uniformity of the light pattern when composite colors are used (e.g., red + blue = magenta). The latter problem is caused by the small but distinct physical separation between the four LED emitters on the RGBW module. This will be mitigated somewhat by the “Gen-2” version of the Creel XM-L RGBW LED, in which this separation is further reduced. Actually, the Gen-2 chips are already available, but I haven’t yet found a source for these LEDs mounted on an aluminum star module.

The beam pattern can be reduced with a lens, but until now I haven’t been able to find a lens that’s intended to work with color LEDs and is small enough for my application. Key phrase: “until now”! I recently found on AliExpress a lens specifically made for the Cree XM-L RGBW LED and with a perfect 21mm diameter. It’s available in multiple beam widths: 10, 25, 45, and 60 degrees. Score! I’ve only done a little bit of testing, but in addition to controlling the beam spread, it appears to slightly improve the composite color uniformity. It should be good enough for the aspen tree project.
Flex Controller
Until recently, I’ve used three different controller boards (all based on the Teensy 4.0 MCU) to meet the needs of various projects: The FLiCr board can drive eight addressable LED strips, or 4 strips plus one RGBW flood/spot lights. It also has the capability to be a master controller that sends commands to remote controller nodes, like the SLiC v2 and SLiC v3 board that I used for the Desert Shark project and are described in this blog post. But for the aspen tree project, I wanted a single board that could drive eight RGBW Fido spotlights. This requires eight groups of four digital-level PWM signals, 32 outputs total. Unfortunately, The Teensy 4.0 MCU doesn’t have enough PWM-capable pins to support this, so I used an external PWM driver chip, the PCA9685. This chip has 16 PWM outputs with 12-bit resolution, and interfaces to the MCU via an I2C bus. Up to 62 devices can be connected to the same I2C bus.
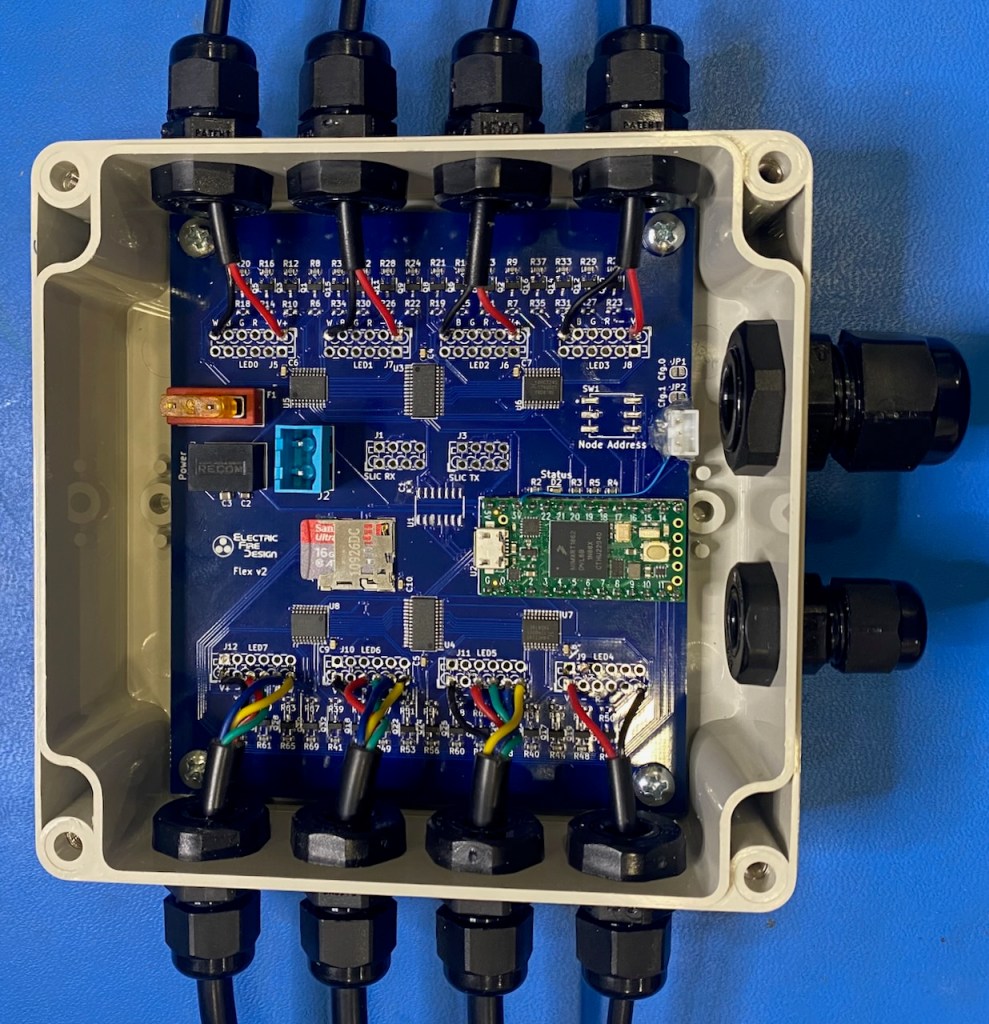
My new Flex controller board uses two PCA9685 chips to generate the required 32 PWM signals. For each chip, the PWM signals are buffered and level shifted (to 5v logic levels) by two 74AHCT245 transceiver chips. The buffer chips will allow the board to drive long cables to the Fido lights in the aspen tree branches.
To make the board even more (ahem) flexible, I used an assembly-configurable output circuit similar to that used on the FLiCr board, as described in this post. In the alternate configuration, each PWM output is driven by an N-channel MOSFET that can sink up to 3 amps. This allows the board to drive eight high-power light fixtures, each of which can use between one and four color channels.
The Flex board design includes a micro-SD card reader, and an RS-422 SLiCBus interface with both transmit and receive capability, so it can operate as a standalone controller, a master controller in a multi-node system, or as a remote controller node.
What’s Next

So much to do! Burning Man 2023 is only a few months away, so I really need to get going on the lighting for the aspen tree and Wave projects. And there’s another big project on the horizon: Bloom is a 40-foot tall jellyfish consisting of a massive steel structure and 1600 glass bowls handcrafted using recycled liquor bottles. Created by Peter Hazel, It was originally displayed at Burning Man 2017 and 2018, and since then has been in (deep) storage in the California Mojave desert. But the new owners of the town of Nipton, CA have purchased Bloom and contracted for its complete rehabilitation. Currently, the structure is in multiple pieces and in pretty sad shape. Many of the lighting components had been previously salvaged and stored indoors, but they were not designed for long-term operation beyond the ~10 day duration of the Burn. So this project will entail a completer redesign of the entire lighting system. Flood lights and addressable strips galore! But much more attention this time to weatherproofing and maintainability.
Thanks for reading! In case you haven’t already discovered this, an index of all 37 of my previous blog posts can be found here.

Awesome Keith. Such great projects.
Those little lenses look quite nifty. Please share more thoughts about those in the future.
LikeLiked by 1 person