As the new year approaches, I thought it would be a good time to provide an update on the projects I have underway, and some new ones that are just getting started.
FidoLight
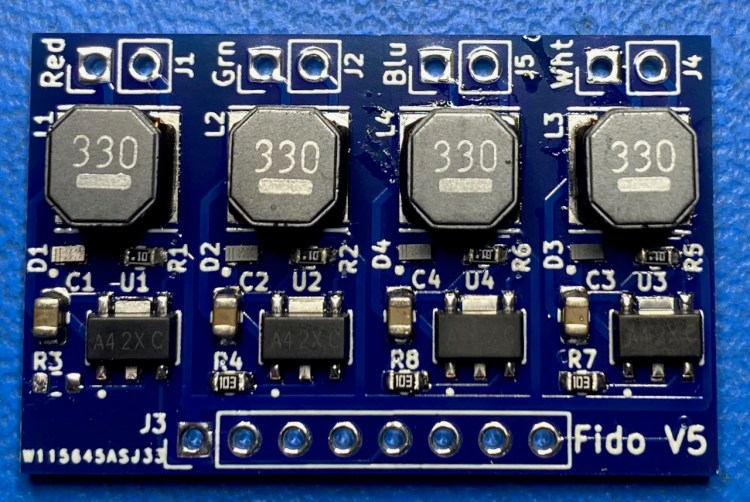
I’m continuing to test the latest version of the 4-channel buck driver board for the RGBW FidoLight spot/flood light. I’ve started experimenting with different gamma correction values to find the value (per color channel) that best produces a linear increase in perceived brightness across the full range of PWM duty cycle. I’m also trying to figure out how to deal with some significant differences in perceived brightness between the color channels. For example, blue seems much dimmer than the other colors, but also results in much higher illuminance readings (in lux) on my very inexpensive illuminance meter. I want to understand how this affects color mixing and the range of achievable colors, and whether there is a good way to compensate for these differences.
But…I’m a little stalled on this effort right now. I’ve allowed myself to get distracted by other shiny new objects, specifically the new projects described further below. Maybe because I’m being paid for those projects…
Flex Controller

I’m continuing to use the new Flex controller for FidoLight testing, and that’s going pretty well. Unfortunately, my oh-so-clever method for sharing GPIO pins between the “node address” DIP switch and the PWM outputs has an issue that I didn’t forsee. Under certain conditions some of the PWM outputs get briefly driven high during the power-up sequence, relating in full-brightness flashes from the FidoLights. There’s an easy fix, but I’ll need to make a minor PC board change. I’ll wait until I complete more testing before I pull the trigger on this change.
Desert Shark

Nothing really to report here. The Desert Shark is still sitting, partially-disassembled, in the parking lot outside Peter Hazel’s studio. Reassembling and installing it here in Reno, Nevada (with no buyer yet) has now taken a distant back seat to the two projects below.
Butterflies
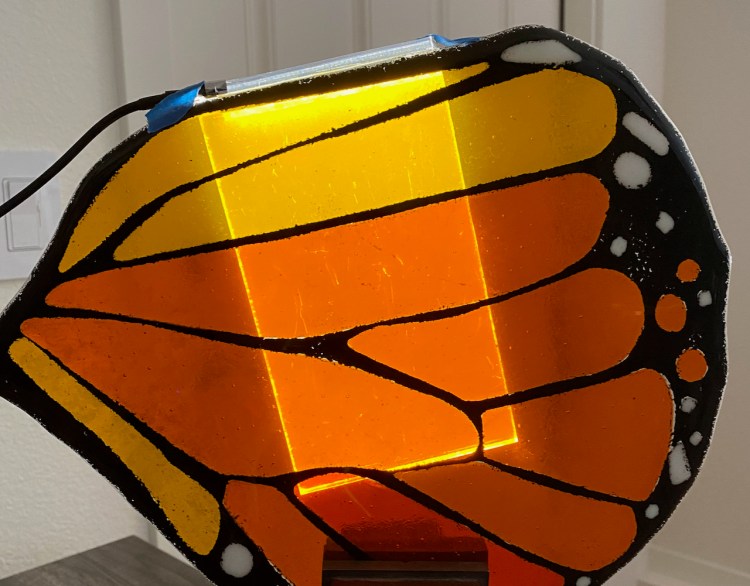
I’m completely stalled on my effort to create an ultra-thin backlight for Peter Hazel’s Dancing Monarch glass butterflies. I haven’t been able to find a source (other than a small sample) for the only acrylic sheet material that works well in this application: ACRYLITE® LED LIGHT GUIDING EDGE LIT SHEET. I’ve tried other types of acrylic advertised as “light guiding”, but none of them come close to the results I achieved with the Acylite sample. Actually, I could buy this material but I’d have to commit to buy at least one full sheet (32 sq. ft, 3 sq. m) at $800 USD. I’ll keep looking.
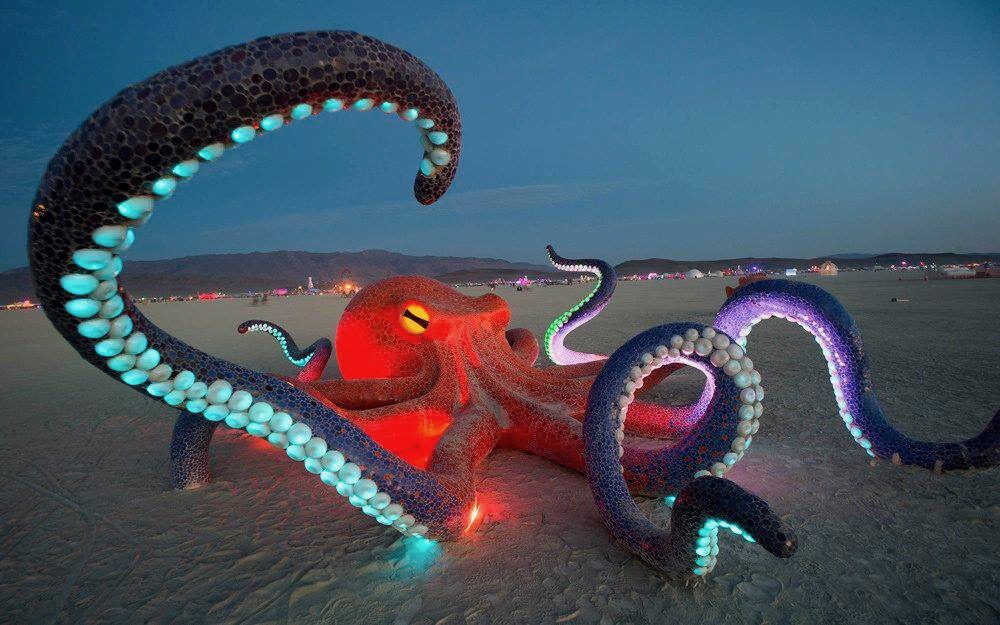
Octavius II
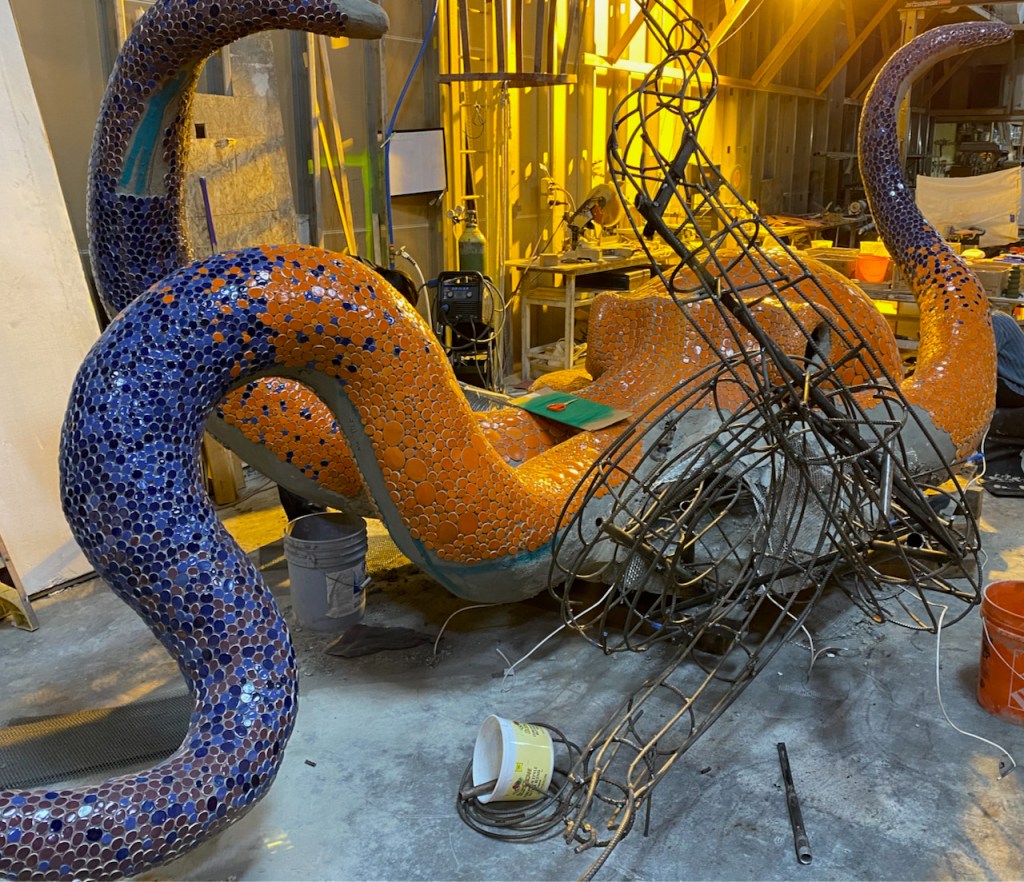
OK, here’s the first of the “new” projects. Well, not exactly new. Peter has been commissioned by a commercial builder to produce a slightly smaller version of Octavius, the 30-foot (9 m) long ceramic tile octopus that he originally created for Burning Man 2016.
The eyes and suckers on the tentacles (not shown in the photo) will be made of recycled Jameson whiskey bottles, and will be illuminated from within.
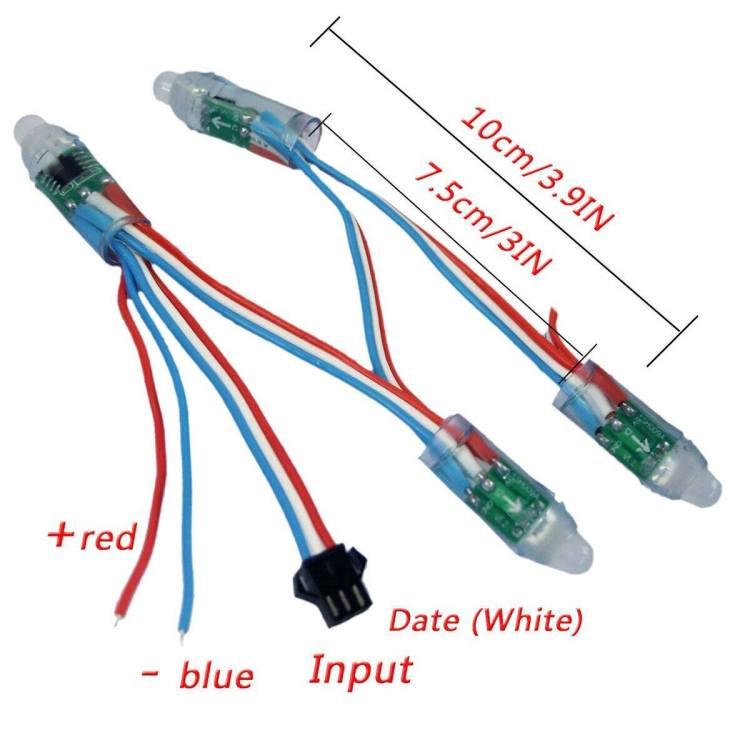
Each of the 40-50 suckers on each tentacle will contain a single bullet-type addressable pixel, the same kind we used for Niloticus the crocodile. Only 5 or 6 of the tentacles will contain lighted suckers, and each tentacle will have a separately-controlled string of LEDs. Each eye will contain a cluster of 5-10 LEDs, and both eyes will be wired together on a single LED string.
Since there will be fewer than 8 individually-controlled LED strings, I plan to use single controller for everything, specifically the FLiCr board configured for 8 addressable LED outputs. The FLiCR board design is described in this post, with an additional update post.

I’m just starting to design the effects, which will mostly be derivatives of effects that I designed for the Desert Shark and Fly By/Manta Ray:
FADE <element> <targetColor> <duration>
Fades the selected lighting “element” (e.g. the eyes or one of the tentacles) from the current color to the targetColor (specified in the HSI color space) over the specified duration. For an explanation of HSI, see the Color Space Conversions” of this post.
FLOW <element> <targetColor> <duration>
Flow the targetColor along the length of the selected element (tentacles only) over the specified duration. Interpolation between the current color and targetColor is applied at the leading edge of the flow.
PULSE <element> <frequency> <level> <amplitude> <rampDuration>
Apply sine wave modulation to the intensity of the current color of the selected element (eyes, tentacle) at the specified frequency. The level and amplitude parameters set the average and peak levels of the modulated intensity. The rampDuration parameter is used to smoothly transition from a previously-executed PULSE effect to the new set of parameters.
WAVE <element> <waveLength> <speed> <amplitude>
Apply sine wave modulation to the intensity of individual pixels in the specified element (tentacles only), creating a traveling wave with the specified wavelength, speed, and amplitude.
Some of these effects can be applied in combination on the same element. For example, it’s possible to FLOW a new color down a tentacle that is already executing a PULSE or WAVE effect.
Anyone have ideas for additional effects? Maybe SWIRL?
Desert Tortoise
This project hasn’t been named yet, but it’s a commission from a city in Southern California for a 20 foot (6.1 m) long desert tortoise. As with most of Peter’s sculptures it will be covered mostly in handmade ceramic tiles. Some of the tiles will be translucent glass tiles, arranged in concentric “rings” as illustrated by the dark lines on the mockup below.

The current lighting concept is to backlight the glass tile rings with addressable LED strips, enabling effects with radial, circular, or linear motion. The challenge will be in mounting the LEDs without interfering with the substantial steel structural elements needed to support a sculpture of this size. One option is to mount parallel LED strips on flat, rectangular panels that are mounted 6-12″ (15-30 cm) behind the tortoise shell’s surface. There wouldn’t be direct alignment between a tile ring and a single LED strip, but this is probably acceptable for the somewhat-subtle effects that would be appropriate for this type of sculpture in a city park setting.
Due to the size of the sculpture and the expected number of LED strips, it’s likely that this project will require multiple power supplies and multiple controllers. The overall architecture will likely be very similar to that used for the Desert Shark and Fly By projects, consisting of a single master controller and 2-4 remote controller nodes.
Future Articles?
I’ll keep you posted with updates on all of the projects above, but I’ve also started coming up with ideas for future “tutorial” articles. Here’s an index of all of the articles I’ve written over the past two years. And here’s a list of the tutorials so far:
Gamma Correction for LED Lighting – 11/14/2022
Weatherproofing Techniques for LED Lighting Systems – 09/21/2022
Wiring Design for Addressable LED Strips – 04/14/2022
Simple Multitasking for Arduino – 03/18/2021
Logic Level Shifters for Driving LED Strips – 03/12/2021
LEDs for Light Art – Part 4: LED Driver Circuits – 02/26/2021
LEDs for Light Art – Part 3: Lighting Techniques – 02/15/2021
LEDs for Light Art – Part 2: Optics – 02/05/2021
LEDs for Light Art – Part 1: LED Types – 01/30/2021
I’d appreciate hearing your suggestions for future articles. Most of the articles above were inspired by frequent questions that I see on various LED-related social media. But I suspect there are other interesting topics that don’t necessarily generate “help needed” type questions.
One idea is to describe there approach that I use for multi-drop serial data communication based on the RS-422 and RS-485 standards. In particular I could describe how I use Consistent Overhead Byte Stuffing (COBS) to implement packet framing, enabling a data receiver to easily identify the start and end of each individual message it receives. An algorithm like COBS is especially important in achieving reliable communication, as it allows a receiver to easily resynchronize with the sender after a message (or part of a message) has been lost or corrupted.
This obviously isn’t lighting-specific, so the article would be aimed at the wider Arduino/embedded control audience. But I’m open to any other ideas you have!
Thanks for reading!

One thought on “Project Updates: December 2022”